Difference between revisions of "Turning Square Tiles into Hex"
Jamiescott (talk | contribs) m (→Method 2: Rotation) |
(→Method 1: Keeping the Orientation) |
||
| Line 7: | Line 7: | ||
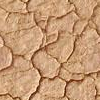
Let's start with a dry mud texture from the standard GIMP library: | Let's start with a dry mud texture from the standard GIMP library: | ||
| − | http:// | + | http://wesnoth.org/wiki-images/tiles-to-hex/hextile1.png |
First it must be scaled to 54x36 pixel size (this applies to the standard 72x72 pixel Wesnoth hexes, for other hexes the figures are width*0.75 and height/2). Then resize the canvas by 2 in both directions and fill the empty space with copies of the tile: | First it must be scaled to 54x36 pixel size (this applies to the standard 72x72 pixel Wesnoth hexes, for other hexes the figures are width*0.75 and height/2). Then resize the canvas by 2 in both directions and fill the empty space with copies of the tile: | ||
| − | http:// | + | http://wesnoth.org/wiki-images/tiles-to-hex/hextile2.png |
Now crop the image to 72x72 pixels (the exact placement of the cropping does not matter) and trim the corners so that it matches the standard hex: | Now crop the image to 72x72 pixels (the exact placement of the cropping does not matter) and trim the corners so that it matches the standard hex: | ||
| − | http:// | + | http://wesnoth.org/wiki-images/tiles-to-hex/hextile3.png |
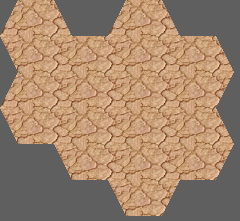
Now comes the moment of truth: what happens when we tile this hex? Let's see: | Now comes the moment of truth: what happens when we tile this hex? Let's see: | ||
| − | http:// | + | http://wesnoth.org/wiki-images/tiles-to-hex/hextile4.png |
Almost makes you believe in magic, doesn't it? | Almost makes you believe in magic, doesn't it? | ||
Revision as of 07:09, 25 March 2014
In Wesnoth the Terrain graphics are made with seamlessly tiling hexagonal pixmaps. These are more difficult to make than square tiles, for which ready made scripts exist in most image manipulation programs, and which can also be found in multitude of libraries, free to use.
If you cut a square tile into a hexagon, it's only going to be seamless in north and south edges. To make it seamless in all edges takes a bit of trickery, but it's relatively simple. There are two methods to do it, the one that is better depending on the circumstances.
Method 1: Keeping the Orientation
Let's start with a dry mud texture from the standard GIMP library:

First it must be scaled to 54x36 pixel size (this applies to the standard 72x72 pixel Wesnoth hexes, for other hexes the figures are width*0.75 and height/2). Then resize the canvas by 2 in both directions and fill the empty space with copies of the tile:

Now crop the image to 72x72 pixels (the exact placement of the cropping does not matter) and trim the corners so that it matches the standard hex:

Now comes the moment of truth: what happens when we tile this hex? Let's see:

Almost makes you believe in magic, doesn't it?
There are two important things to notice:
- The size and aspect ratio of the original texture are not preserved (unless it is already 54x36 pixels), but this can be a good thing. If you start with a square tile where the pattern is seen as if looking down from above, when it gets scaled down vertically, it creates an impression of perspective (in Wesnoth, the terrain is seen from an angle, not directly above).
- The hex will contain the original pattern twice, that is, every unique feature in the original tile will appear in the hex tile two times. This may make the pattern appear too densely repeating, but once you have the hex made, you can change something about one copy of each feature to counteract this effect (as long as you don't touch the edge pixels, the tile will stay seamless).
Method 2: Rotation
In the second method the original tile must be square, for it will be rotated 45 degrees. The rotation may prove useful in cases where the pattern has straight forms, like stripes or checkers. In that case the end result will generally look better if the lines go from SE to NW and SW to NE rather than from south to north and west to east. So if your pattern has strong lines vertically or horizontally, you should use this method.
If the original tile is not square, scale it horizontally or vertically so that it is. Double the size of the canvas in both directions and fill the space with copies of the tile, creating a 2x2 pattern. Below is our example, a ceramic tile pattern:

Next rotate the image 45 degrees and scale it so that the height becomes 144 and width 216 pixels:

Then cut the hex shape out anywhere you like (don't include any transparent pixels), and that's it (notice that the pattern appears only once in the hex):

If you doubt that it can be this simple, let's see how it tiles:

Which method to use depends on your requirements. If you need to preserve the original orientation, use method 1. If you need the rotation, or must have the pattern repeated only once per hex, use method 2 (simultaneously preserving orientation and having 1 repeat/hex is not possible with these methods). If the orientation and repeat number don't matter, the appropriate method depends on the desired size of the pattern: method 2 reproduces the pattern twice as big as method 1.